

As a supplier of Pipeline Molds, ensuring the correct assembly of these molds is crucial for the quality and efficiency of the final products. In this blog, I will share some key steps and considerations to guarantee the proper assembly of a Pipeline Mold.
1. Pre - assembly Preparation
Before starting the assembly process, it is essential to conduct a thorough inspection of all the mold components. Check for any signs of damage, such as cracks, dents, or excessive wear. Each part should be clean and free from debris. This includes the core, cavity, inserts, and any other auxiliary components.
Inspect the dimensions of the components to ensure they meet the design specifications. A minor deviation in dimensions can lead to significant issues during the assembly and the subsequent production process. Use precision measuring tools like calipers and micrometers to verify the accuracy of the parts.
Organize the components in a logical order. Group similar parts together and label them if necessary. This will make the assembly process more efficient and reduce the chances of misplacing or using the wrong components.
2. Understanding the Assembly Drawing
The assembly drawing is the blueprint for the correct assembly of the Pipeline Mold. It provides detailed information about how each component fits together, the orientation of the parts, and the sequence of assembly.
Study the assembly drawing carefully. Identify the key features and dimensions of each part and understand how they interact with one another. Pay special attention to any mating surfaces, alignment marks, or fastening points.
If there are any unclear or ambiguous parts in the drawing, consult the design engineer or the technical team for clarification. Do not proceed with the assembly until you have a clear understanding of the drawing.
3. Assembly Process
3.1 Base Installation
Start by installing the base of the Pipeline Mold. The base provides the foundation for the entire mold structure. Ensure that the base is level and firmly secured to the workbench or the molding machine. Use appropriate fasteners and follow the recommended torque values to prevent any movement during the assembly and operation of the mold.
3.2 Core and Cavity Placement
The core and cavity are the main components that shape the pipeline. Carefully place the core and cavity into the base, aligning them according to the assembly drawing. Use alignment pins or guides to ensure accurate positioning. Check the fit between the core and cavity to ensure there are no gaps or misalignments.
3.3 Insert Installation
Inserts are used to create specific features in the pipeline, such as sockets or spigots. Install the inserts in the appropriate locations in the core or cavity. Make sure they are properly seated and secured. Check the alignment of the inserts with the surrounding components to ensure a smooth and accurate molding process.
3.4 Fastening and Sealing
Once all the components are in place, fasten them together using the appropriate bolts, screws, or clamps. Follow the recommended torque values to ensure a secure connection. Apply a suitable sealant to prevent any leakage during the molding process. Pay attention to the sealing of joints and interfaces to maintain the integrity of the mold.
4. Quality Control during Assembly
Throughout the assembly process, it is important to conduct regular quality checks. Use inspection tools to verify the alignment, fit, and dimensions of the components. Check for any signs of misalignment, interference, or improper installation.
Perform a dry run of the mold operation if possible. This will help identify any potential issues before the actual production. Check the movement of any moving parts, such as slides or ejectors, to ensure they operate smoothly.
If any issues are detected during the quality control process, take immediate corrective actions. This may involve adjusting the components, replacing damaged parts, or re - assembling the mold.
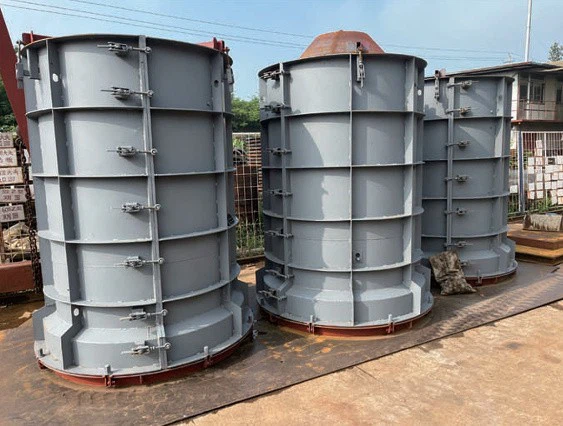

5. Post - assembly Testing
After the assembly is complete, conduct a comprehensive testing of the Pipeline Mold. This includes a visual inspection to check for any visible defects or damage. Check the functionality of all the components, such as the opening and closing of the mold, the movement of the ejectors, and the operation of any auxiliary systems.
Perform a trial run with a small amount of material to check the molding process. Monitor the quality of the molded pipeline, including its dimensions, surface finish, and any specific features. Analyze the results of the trial run and make any necessary adjustments to the mold or the molding process.
6. Documentation
Maintain detailed documentation of the assembly process. This includes records of the inspection results, the assembly sequence, the torque values used for fastening, and the results of the post - assembly testing. This documentation will be useful for future reference, quality control, and troubleshooting.
7. Training and Support
Provide training to the operators who will be using the Pipeline Mold. Ensure they understand the correct assembly and operation procedures. Offer ongoing support to address any questions or issues that may arise during the use of the mold.
Conclusion
Ensuring the correct assembly of a Pipeline Mold is a complex but essential process. By following the steps outlined above, you can minimize the risk of errors and ensure the production of high - quality pipelines. As a [Your Company's Role] Pipeline Mold supplier, we are committed to providing our customers with high - quality molds and comprehensive support. If you are interested in our Pipeline Mold, Cement Pipe Mold, or Socket - and - Spigot Cement Pipe Mold, please feel free to contact us for further discussion and procurement negotiation.
References
- Smith, J. (2018). Handbook of Mold Design and Manufacturing. Publisher X.
- Johnson, R. (2019). Quality Control in Mold Assembly. Journal of Manufacturing Technology, 25(3), 123 - 135.