

Hey there! I'm a supplier of canal molds, and I know how crucial it is to ensure the proper alignment of these molds. In this blog, I'll share some practical tips and tricks that I've learned over the years to help you achieve that perfect alignment.
First off, let's talk about why proper alignment matters. When a canal mold isn't aligned correctly, it can lead to a whole bunch of problems. The resulting canal might not have the right dimensions, which can affect its functionality. For example, if it's a drainage canal, improper alignment could cause poor water flow, leading to waterlogging or other drainage issues. Also, misaligned molds can make the construction process more difficult and time - consuming, and it might even increase the cost due to rework.
Understanding the Basics of Canal Molds
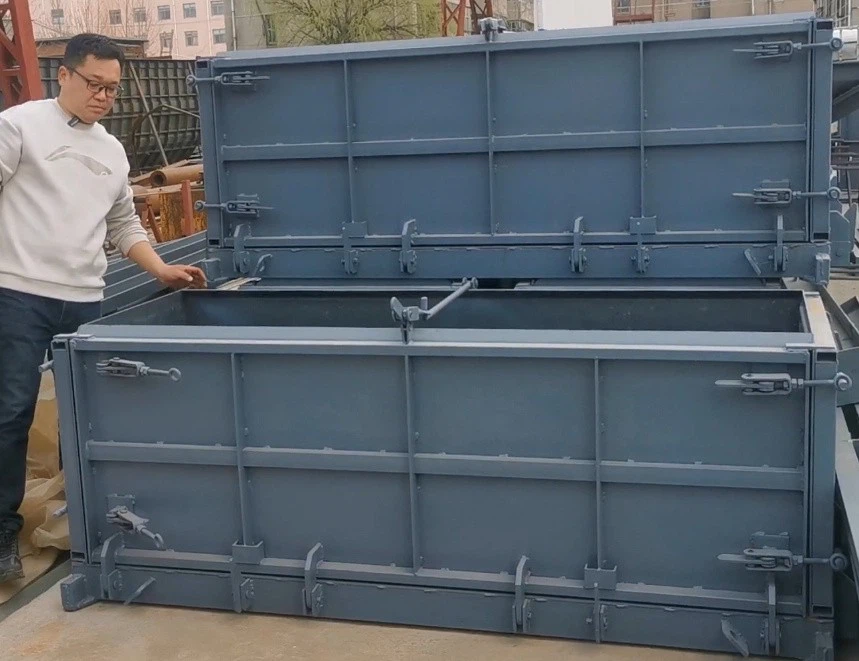
Before we dive into the alignment process, it's important to know a bit about the different types of canal molds. There are various kinds out there, like the Flume Mold, U - shaped Groove Mold, and Rectangular Groove Mold. Each type has its own unique shape and requirements for alignment.
Flume molds are often used for water conveyance in irrigation systems. They need to be aligned precisely to ensure smooth water flow. U - shaped groove molds are great for drainage in areas with high water volume, and proper alignment is key to prevent water from seeping out. Rectangular groove molds are commonly used in construction sites for various drainage purposes, and accurate alignment helps in maintaining the structural integrity of the canal.
Pre - installation Checks
The first step in ensuring proper alignment is to do a thorough pre - installation check. Start by examining the site where the canal will be built. The ground should be level and free of any debris or obstacles. Use a leveling instrument, like a laser level or a spirit level, to check the flatness of the ground. If the ground isn't level, you'll need to make some adjustments. You can either fill in the low spots with soil or remove the high spots to create a smooth surface.
Next, inspect the canal mold itself. Look for any signs of damage, such as cracks or dents. A damaged mold can affect the alignment and the quality of the final canal. Make sure all the parts of the mold are in good condition and that they fit together properly. Check the dimensions of the mold to ensure they match the design specifications.

Setting Up the Alignment Tools
Once you've done the pre - installation checks, it's time to set up the alignment tools. One of the most commonly used tools is a string line. You can stretch a string line along the length of where the canal will be built. Make sure the string is tight and level. You can use stakes to hold the string in place at regular intervals. The string line will serve as a guide for the alignment of the mold.
Another useful tool is a plumb bob. A plumb bob is a weight attached to a string, and it hangs vertically. You can use it to check the vertical alignment of the mold. Place the plumb bob at different points along the mold and make sure the mold is perfectly vertical.
Installing the Canal Mold
Now comes the actual installation of the canal mold. Start by positioning the first section of the mold at one end of the string line. Use a level to make sure the mold is horizontal and vertical. You might need to make some minor adjustments by adding or removing shims under the mold. Shims are thin pieces of material that can be used to level and align the mold.
Once the first section is in place, connect the next section of the mold. Make sure the joints between the sections are tight and properly aligned. You can use clamps or bolts to secure the sections together. As you continue to install the mold, keep referring back to the string line and the plumb bob to ensure the alignment is consistent throughout the length of the canal.
Monitoring the Alignment During the Pouring Process
After the mold is installed, it's time to pour the concrete or other filling material into the mold. During the pouring process, the weight of the material can cause the mold to shift. That's why it's important to monitor the alignment continuously. Keep an eye on the string line and the plumb bob. If you notice any movement or misalignment, stop the pouring process immediately and make the necessary adjustments.
You can also use additional support structures, like braces or jacks, to prevent the mold from shifting. Place the braces or jacks at regular intervals along the mold to provide extra stability.
Final Checks and Adjustments
Once the concrete has set, it's time to do the final checks and adjustments. Remove the alignment tools and inspect the canal. Check the dimensions of the canal to make sure they match the design specifications. Use a measuring tape or a laser measuring device to measure the width, depth, and length of the canal.
Look for any signs of misalignment, such as uneven walls or a crooked shape. If you find any issues, you can make some minor adjustments. You can use a grinder or a chisel to remove any excess concrete or to smooth out the rough edges.
Quality Control and Testing
To ensure the long - term performance of the canal, it's important to conduct quality control and testing. You can do a water flow test to check the functionality of the canal. Fill the canal with water and observe how it flows. If the water doesn't flow smoothly or if there are any areas of stagnant water, it could indicate a problem with the alignment.
You can also perform a structural integrity test. Look for any cracks or signs of damage in the canal. A well - aligned canal should be able to withstand the pressure of the water and other external forces without any issues.
Conclusion
Ensuring the proper alignment of a canal mold is a crucial step in the construction of a high - quality canal. By following these steps, from pre - installation checks to final adjustments and testing, you can achieve the perfect alignment. Remember, a well - aligned canal not only looks good but also functions efficiently.
If you're in the market for canal molds or have any questions about the alignment process, don't hesitate to reach out. I'm here to help you with all your canal mold needs. Whether you're working on a small irrigation project or a large - scale construction site, I can provide you with the right molds and the expertise to ensure a successful project.
References
- Construction Materials Handbook: A guide to the properties and uses of building materials.
- Civil Engineering Manual: Covers various aspects of civil engineering, including canal construction.
- Practical Guide to Canal Design and Construction: Offers in - depth knowledge on canal design and the importance of proper alignment.