

Hey there! As a supplier of drainage canal molds, I've seen firsthand how important it is to have a smooth - flowing drainage canal. A smooth canal not only improves water flow but also reduces the risk of blockages and extends the lifespan of the canal. So, in this blog, I'm gonna share some tips on how to improve the smoothness of the drainage canal made by molds.
1. Choose the Right Mold
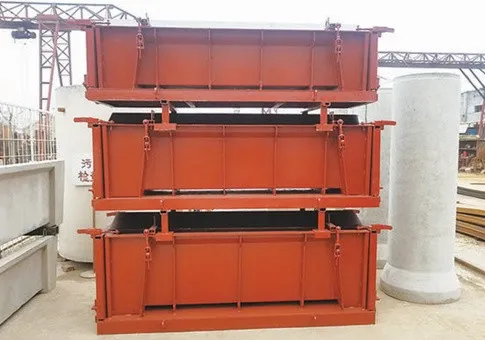
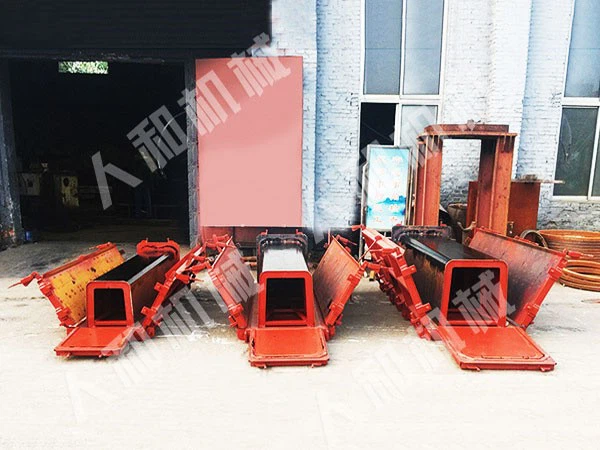
The first step in creating a smooth drainage canal is to select the appropriate mold. We offer a variety of molds, such as the Rectangular Groove Mold, Farmland Irrigation Canal Mold, and Canal Mold. Each mold is designed with specific features to ensure a smooth finish.
For instance, the Rectangular Groove Mold has well - defined edges and a flat surface, which helps in creating a smooth and straight canal. The Farmland Irrigation Canal Mold is engineered to fit the needs of agricultural areas, with a design that promotes efficient water flow. And the Canal Mold is suitable for larger - scale projects, offering a consistent and smooth shape.
2. Prepare the Mold Properly
Before using the mold, it's crucial to prepare it correctly. First, clean the mold thoroughly to remove any dirt, debris, or old concrete residues. You can use a high - pressure water jet or a mild detergent to clean the mold. This will prevent any rough spots or bumps from forming on the canal surface.
Next, apply a release agent to the mold. A good release agent helps the concrete separate easily from the mold after it has hardened. There are different types of release agents available, such as oil - based and water - based ones. Make sure to choose a release agent that is compatible with the type of concrete you'll be using.
3. Use High - Quality Concrete
The quality of the concrete plays a significant role in the smoothness of the drainage canal. Use a high - strength concrete mix that has a low water - cement ratio. A lower water - cement ratio results in a denser and smoother concrete surface.
Also, consider adding additives to the concrete mix. For example, plasticizers can improve the workability of the concrete, making it easier to pour and spread evenly in the mold. Air - entraining agents can create tiny air bubbles in the concrete, which helps in reducing the risk of cracking and improving the overall smoothness.
4. Pour the Concrete Correctly
When pouring the concrete into the mold, it's important to do it slowly and evenly. Use a concrete pump or a chute to ensure that the concrete is distributed uniformly throughout the mold. Avoid over - filling the mold, as this can cause the concrete to spill over and create an uneven surface.
During the pouring process, use a vibrating tool to remove any air bubbles from the concrete. Vibrating the concrete helps in compacting it and creating a smooth and dense surface. Make sure to vibrate the concrete for an appropriate amount of time, usually around 20 - 30 seconds per area.
5. Cure the Concrete Properly
Proper curing is essential for achieving a smooth and durable drainage canal. After the concrete has been poured and leveled, cover it with a plastic sheet or a curing compound. This helps in retaining moisture and preventing the concrete from drying out too quickly.
The curing time can vary depending on the type of concrete and the environmental conditions. Generally, it takes about 7 - 14 days for the concrete to fully cure. During this time, make sure to keep the concrete moist by spraying it with water regularly.
6. Finish the Surface
Once the concrete has cured, you can further improve the smoothness of the drainage canal by finishing the surface. You can use a trowel to smooth out any rough spots or uneven areas. For a more polished finish, you can use a power trowel or a grinder.
If you want to add an extra layer of protection and smoothness, you can apply a sealant to the canal surface. A sealant not only makes the surface smoother but also helps in preventing water penetration and reducing the risk of corrosion.
7. Regular Maintenance
Even after the drainage canal is built, regular maintenance is necessary to keep it smooth. Inspect the canal regularly for any signs of damage, such as cracks or blockages. Clean the canal periodically to remove any debris or sediment that may accumulate over time.
If you notice any rough spots or uneven areas, you can repair them using a concrete patching compound. This will help in maintaining the smoothness of the canal and ensuring its proper functioning.
Conclusion
Improving the smoothness of the drainage canal made by molds is a multi - step process that involves choosing the right mold, preparing it properly, using high - quality concrete, pouring and curing it correctly, finishing the surface, and performing regular maintenance. By following these tips, you can create a drainage canal that is not only smooth but also efficient and long - lasting.
If you're interested in purchasing our drainage canal molds or have any questions about improving the smoothness of your drainage canal, feel free to reach out. We're here to help you with all your drainage canal mold needs.
References
- "Concrete Construction Handbook" by the American Concrete Institute
- "Mold Design and Manufacturing" by various industry experts