

When it comes to constructing sloped ditches, using a ditch mold is an efficient and cost - effective solution. As a ditch mold supplier, I have witnessed firsthand the benefits that these molds bring to various construction projects. In this blog, I will guide you through the process of using a ditch mold for sloped ditches, from preparation to the final steps.
1. Understanding the Basics of Sloped Ditches and Ditch Molds
Sloped ditches are designed to efficiently drain water or other fluids. They are commonly used in road construction, agricultural fields, and industrial sites. The slope of the ditch helps water flow smoothly towards a designated outlet, preventing waterlogging and potential damage.
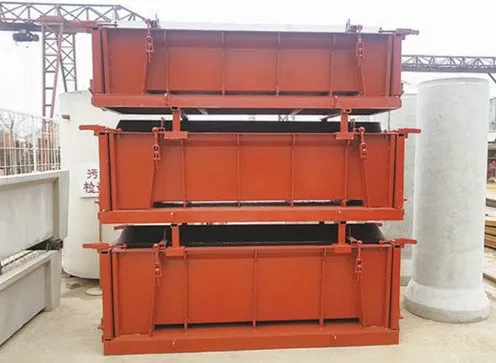
Ditch molds are pre - fabricated forms that are used to create ditches of specific shapes and sizes. They are typically made from materials such as plastic, fiberglass, or steel, depending on the requirements of the project. These molds offer several advantages, including consistent quality, reduced labor costs, and faster construction times.
2. Selecting the Right Ditch Mold
The first step in using a ditch mold for sloped ditches is to select the appropriate mold. Consider the following factors:
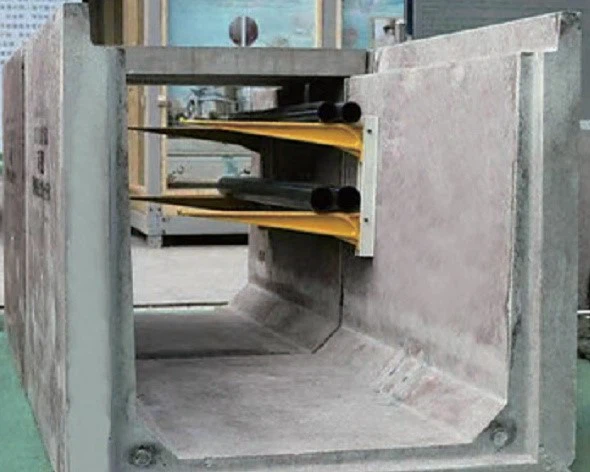
- Shape and Size: The shape of the ditch can vary, such as U - shaped, V - shaped, or arched. For example, a U - shaped Cable Trench Mold is suitable for applications where a wider base and gentle slopes are required. The size of the mold should match the dimensions of the desired ditch.
- Material: As mentioned earlier, different materials have different properties. Plastic molds are lightweight and easy to handle, while steel molds are more durable and can withstand heavy use. Fiberglass molds offer a good balance between strength and weight.
- Slope Requirements: Ensure that the mold is designed to create the desired slope for the ditch. The slope is crucial for proper water drainage.
3. Site Preparation
Before using the ditch mold, proper site preparation is essential:
- Clearing the Area: Remove any debris, vegetation, or rocks from the area where the ditch will be constructed. This will ensure a smooth surface for the mold installation.
- Marking the Ditch Line: Use stakes and string to mark the outline of the ditch. This will help you align the mold accurately.
- Excavation: Excavate the area to the required depth and width. The excavation should be slightly larger than the dimensions of the mold to allow for proper placement.
4. Mold Installation
Once the site is prepared, it's time to install the ditch mold:
- Positioning the Mold: Carefully place the mold along the marked ditch line. Make sure it is level and properly aligned. Use a spirit level to check the horizontal and vertical alignment.
- Securing the Mold: Anchor the mold in place using stakes or other suitable fasteners. This will prevent the mold from shifting during the concrete pouring process.
- Joint Sealing: If using multiple mold sections, ensure that the joints are properly sealed to prevent concrete leakage. You can use a sealing compound or tape for this purpose.
5. Concrete Mixing and Pouring
The next step is to prepare the concrete and pour it into the mold:
- Concrete Mix: Use a high - quality concrete mix that is suitable for the specific application. The mix should have the right consistency to ensure proper filling of the mold.
- Pouring Process: Pour the concrete into the mold slowly and evenly. Use a vibrator to remove any air bubbles and ensure that the concrete fills all the corners of the mold.
- Leveling the Surface: Once the concrete is poured, use a screed to level the surface. This will give the ditch a smooth and even finish.
6. Curing and Demolding
After pouring the concrete, it needs to cure properly:
- Curing Time: The curing time depends on various factors such as the type of concrete, temperature, and humidity. Generally, it takes about 24 - 48 hours for the concrete to set sufficiently.
- Demolding: Once the concrete has cured, carefully remove the mold. Start by removing the fasteners and then gently lift the mold off the ditch. Be careful not to damage the newly formed ditch.
7. Finishing Touches
After demolding, some finishing touches may be required:
- Smoothing the Surface: Use a trowel or sandpaper to smooth any rough edges or surfaces. This will improve the appearance and functionality of the ditch.
- Inspection: Inspect the ditch for any cracks or defects. If any issues are found, repair them immediately.
8. Maintenance and Long - Term Use
To ensure the long - term performance of the sloped ditch, proper maintenance is necessary:
- Regular Cleaning: Remove any debris or sediment from the ditch to prevent blockages.
- Inspection: Periodically inspect the ditch for signs of damage or wear. Repair any issues promptly to avoid further problems.
9. Other Types of Ditch Molds
In addition to the common ditch molds, there are other specialized types available. For example, the Arched Cable Trench Mold is designed for cable trenches with an arched shape. This type of mold is ideal for protecting cables and providing a smooth surface for cable installation.
Another option is the Cast - in - Place Cable Trench Mold, which is used for creating cable trenches on - site. This mold allows for more flexibility in terms of shape and size, and it can be customized to meet specific project requirements.
10. Contact for Purchase and Consultation
If you are interested in purchasing ditch molds for your sloped ditch projects, or if you have any questions about the selection, installation, or use of these molds, please feel free to contact us. Our team of experts is ready to provide you with detailed information and guidance to ensure that you make the right choice for your project.
References
- Construction Materials Handbook: A Guide to Building Materials and Their Applications
- Ditch Design and Construction Manual for Civil Engineers
- Concrete Technology: Principles and Practice