

As a seasoned supplier of Cement Pipe Mold, I've witnessed firsthand the significance of correct operation in the manufacturing of cement pipes. A well - operated mold not only ensures the quality of the final product but also extends the lifespan of the mold, leading to cost - effective production. In this blog, I'll walk you through the key steps and considerations for operating a cement pipe mold correctly.
Pre - operation Preparation
Inspection of the Mold
Before starting the operation, a thorough inspection of the Cement Pipe Mold is essential. Check for any signs of damage, such as cracks, dents, or worn - out parts. Pay special attention to the sealing surfaces, as a good seal is crucial to prevent cement leakage during the molding process. If any damage is detected, repair or replace the affected parts before proceeding.
Cleaning and Lubrication
Clean the mold inside and out to remove any debris, old cement residues, or rust. You can use a wire brush, compressed air, or a suitable cleaning agent. After cleaning, apply a thin layer of lubricant to the inner surface of the mold. The lubricant not only facilitates the demolding process but also protects the mold from corrosion. Make sure to use a lubricant specifically designed for cement pipe molds to avoid any negative effects on the cement quality.
Assembly and Installation
If your Cement Pipe Mold consists of multiple parts, assemble them correctly according to the manufacturer's instructions. Ensure that all bolts and fasteners are tightened properly to prevent any movement during the operation. Install the mold on a stable and level surface, such as a concrete foundation or a sturdy workbench. The stability of the installation is vital for ensuring the uniform shape and quality of the cement pipes.
Cement Mix Preparation
The quality of the cement mix has a direct impact on the performance of the Cement Pipe Mold and the final product. Use high - quality cement, aggregates, and water in the correct proportions. The water - cement ratio is particularly important, as it affects the workability, strength, and durability of the cement pipes.
Follow the recommended mix design provided by the cement supplier or a professional engineer. Mix the components thoroughly using a suitable mixer. Over - mixing or under - mixing can lead to inconsistent quality and may cause problems during the molding process.
Molding Process
Filling the Mold
Once the mold is prepared and the cement mix is ready, it's time to fill the mold. Pour the cement mix into the mold slowly and evenly, ensuring that it fills all the compartments and corners of the Cement Pipe Mold. Use a vibrator to remove any air bubbles trapped in the cement. The vibration helps to compact the cement, resulting in a denser and stronger pipe.
For larger molds or more complex pipe designs, you may need to fill the mold in stages, vibrating after each layer to ensure proper compaction. Be careful not to over - vibrate, as this can cause segregation of the cement mix and weaken the pipe.
Compaction and Shaping
After filling the mold, continue to vibrate the mold for a short period to further compact the cement and shape the pipe. The vibration time depends on the type and size of the mold, as well as the properties of the cement mix. Some molds, such as Roller Suspension Pipe Mold, may require additional rotation or movement to achieve the desired shape and density.
During the compaction and shaping process, monitor the mold closely to ensure that the cement is properly distributed and that there are no signs of leakage or deformation.
Curing
Curing is a critical step in the production of cement pipes. After filling and shaping, cover the Cement Pipe Mold with a tarp or plastic sheet to prevent moisture loss. Keep the mold in a warm and humid environment for a specified period, usually 24 to 48 hours. This allows the cement to hydrate properly and gain strength.
The curing conditions, including temperature and humidity, can significantly affect the final properties of the cement pipes. Follow the recommended curing schedule provided by the cement supplier or based on industry standards.
Demolding
Once the cement pipes have reached sufficient strength, it's time to demold them. Carefully loosen the bolts and fasteners of the mold and gently separate the mold from the pipe. For some molds, such as Socket - and - Spigot Cement Pipe Mold, special tools or techniques may be required to ensure a smooth demolding process.
Avoid using excessive force during demolding, as this can damage the pipe or the mold. After demolding, inspect the pipes for any defects, such as cracks or surface imperfections. If necessary, perform minor repairs on the pipes before storing or transporting them.
Post - operation Maintenance
Cleaning and Storage
After each use, clean the Cement Pipe Mold thoroughly to remove any remaining cement residues. Apply a rust - preventive coating to the mold to protect it from corrosion during storage. Store the mold in a dry and protected area, preferably on a rack or stand to prevent any deformation.
Regular Inspection and Maintenance
Periodically inspect the mold for wear and tear. Check the moving parts, such as hinges and bolts, for any signs of damage or loosening. Replace any worn - out parts promptly to ensure the continued performance of the mold. Lubricate the moving parts regularly to reduce friction and extend their lifespan.
Troubleshooting
Even with proper operation, you may encounter some problems during the use of the Cement Pipe Mold. Here are some common issues and their solutions:
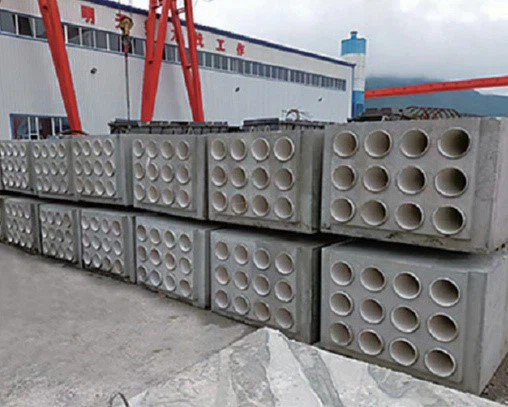

Cement Leakage
If you notice cement leakage during the molding process, check the sealing surfaces of the mold. Tighten the bolts and fasteners or replace the sealing gaskets if necessary. Make sure that the mold is properly assembled and installed on a level surface.
Pipe Surface Imperfections
Surface imperfections, such as air bubbles or rough surfaces, can be caused by improper vibration or a poor - quality cement mix. Adjust the vibration time and intensity, and ensure that the cement mix is well - mixed and has the correct water - cement ratio.
Difficulty in Demolding
If you have trouble demolding the pipes, check the lubrication of the mold. Apply more lubricant if necessary. Also, make sure that the pipes have reached sufficient strength before demolding.
Conclusion
Operating a Cement Pipe Mold correctly requires attention to detail and strict adherence to the recommended procedures. By following the steps outlined in this blog, you can ensure the quality of your cement pipes, extend the lifespan of your mold, and improve the efficiency of your production process.
If you're in the market for high - quality Cement Pipe Mold, Roller Suspension Pipe Mold, Pipeline Mold, or Socket - and - Spigot Cement Pipe Mold, feel free to reach out for a consultation. We're here to help you find the best solutions for your specific needs and ensure a successful production process.
References
- ASTM International Standards for Cement Pipe Manufacturing.
- Manufacturer's Manuals for Cement Pipe Molds.
- Industry Best Practices in Cement Pipe Production and Mold Operation.